

Aim
This post will show you how the format of ARM templates and how to deploy the simplest one without parameters or variables via the Portal, Powershell, AZ CLI.
Pre-reqs
You’ll need:
- An Azure account
- The latest Azure Powershell. Install instructions can be found here (https://docs.microsoft.com/en-us/powershell/azure/install-azurerm-ps?view=azurermps-6.10.0)
- Your preferred Code Editor, I mostly use Notepad++
ARM Template Format
As you’ll see shortly the format of an ARM template is relatively simple. It’s a declarative tool, which means that you are saying “I want these resources created, go do”. It’s not a procedural language where the first thing in your file gets created first (unless you use dependencies which we’ll get to later). Here’s a completely empty ARM template
{
    "$schema": "http://schema.management.azure.com/schemas/2015-01-01/deploymentTemplate.json#",
    "contentVersion": "",
    "parameters": {  },
    "variables": {  },
    "functions": [  ],
    "resources": [  ],
    "outputs": {  }
}
Revolutionary right! Well it’s good to look at an empty template as it helps us understand what we’re giving ARM to do.
- A list of parameters. These could be things like a name for a VM, or the IP range for a vNet e.g. 10.0.0.0/8
- A list of variables, this is where you could set things like a variable called “myLocation” based on the Resource Group you are deploying to, or maybe you want to take the users’ name for a VM and add “-VM” to the end. We’ll see how to do that in a later post.
- A list of functions, these are relatively new but could be used to generate unique names with a prefix.
- A list of resources. This is the key section this is where the magic happens and where you tell ARM what things you want, and sometimes in which order. e.g. a VPN gateway can’t be deployed until you have a Public IP. We’ll see how we tell ARM to wait on other resources in a later post.
- Finally outputs. In the portal, this is just a nice to see list. In Powershell, CLI or using a “Nested” template, it means you can pass values out of the end result of a template deployment to be used by another process, even another template.
Steps to create your first template via the portal
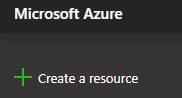
- Log in to Azure and click “Create a Resource”
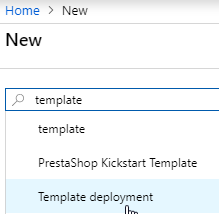
- Type “template” in the search box and select “Template Deployment” and click “Create”
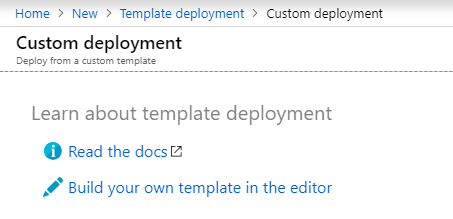
- Select “Build your own template in the editor”
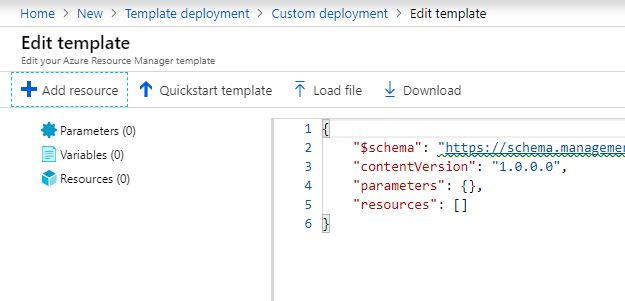
- Now you’ll see you have a blank templates (and no variables,functions or outputs section…which is fine)
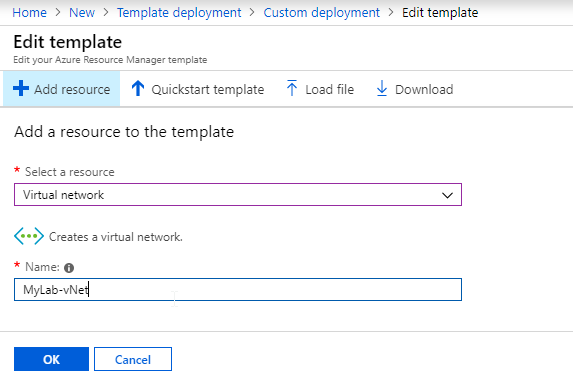
- Select “Add Resource” and choose “Virtual Network” from the drop down and enter a name for your vNet and click OK
Now woosh, there you have it, your first template to deploy a vNet. You can see on the left 1 resource and 5 variables…..but wait, you didn’t define any variables? No Azure did as it’s best practice and makes it easy to edit later and change or even parameterise. Your template should look identical to this.
{
    "$schema": "https://schema.management.azure.com/schemas/2015-01-01/deploymentTemplate.json#",
    "contentVersion": "1.0.0.0",
    "parameters": {},
    "resources": [
        {
            "name": "MyLab-vNet",
            "type": "Microsoft.Network/virtualNetworks",
            "location": "[resourceGroup().location]",
            "apiVersion": "2015-06-15",
            "dependsOn": [],
            "tags": {
                "displayName": "MyLab-vNet"
            },
            "properties": {
                "addressSpace": {
                    "addressPrefixes": [
                        "[variables('MyLab-vNetPrefix')]"
                    ]
                },
                "subnets": [
                    {
                        "name": "[variables('MyLab-vNetSubnet1Name')]",
                        "properties": {
                            "addressPrefix": "[variables('MyLab-vNetSubnet1Prefix')]"
                        }
                    },
                    {
                        "name": "[variables('MyLab-vNetSubnet2Name')]",
                        "properties": {
                            "addressPrefix": "[variables('MyLab-vNetSubnet2Prefix')]"
                        }
                    }
                ]
            }
        }
    ],
    "variables": {
        "MyLab-vNetPrefix": "10.0.0.0/16",
        "MyLab-vNetSubnet1Name": "Subnet-1",
        "MyLab-vNetSubnet1Prefix": "10.0.0.0/24",
        "MyLab-vNetSubnet2Name": "Subnet-2",
        "MyLab-vNetSubnet2Prefix": "10.0.1.0/24"
    }
}
We could deploy that but I want to make this the simplest template ever so I’m going to delete the 2 variables referring to subnet 2 and the section under resources/subnets to ditch the second subnet. I’ve also removed the depends on statement as it’s redundant here. Your Template code should now look neater and easy enough to read.
{
    "$schema": "https://schema.management.azure.com/schemas/2015-01-01/deploymentTemplate.json#",
    "contentVersion": "1.0.0.0",
    "parameters": {},
    "resources": [
        {
            "name": "MyLab-vNet",
            "type": "Microsoft.Network/virtualNetworks",
            "location": "[resourceGroup().location]",
            "apiVersion": "2015-06-15",
            "tags": {
                "displayName": "MyLab-vNet"
            },
            "properties": {
                "addressSpace": {
                    "addressPrefixes": [
                        "[variables('MyLab-vNetPrefix')]"
                    ]
                },
                "subnets": [
                    {
                        "name": "[variables('MyLab-vNetSubnet1Name')]",
                        "properties": {
                            "addressPrefix": "[variables('MyLab-vNetSubnet1Prefix')]"
                        }
                    }
                ]
            }
        }
    ],
    "variables": {
        "MyLab-vNetPrefix": "10.0.0.0/16",
        "MyLab-vNetSubnet1Name": "Subnet-1",
        "MyLab-vNetSubnet1Prefix": "10.0.0.0/24"
    }
}
Ok, now click the “Download” above your template code (we’re saving it for later to deploy again).
Click “Save” and you’ll be taken to the “Purchase” page. Don’t panic….vnets are free!
Select a subscription and a resource group (or create a new one) and a location to deploy the vnet, tick the “I agree” box and click purchase.
You can see that it’s been submitted if you click the alarm bell near the top left.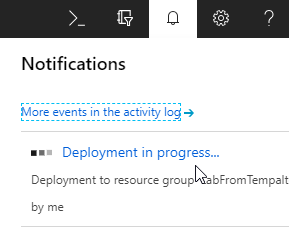
Click on the deployment in progress to see more details.
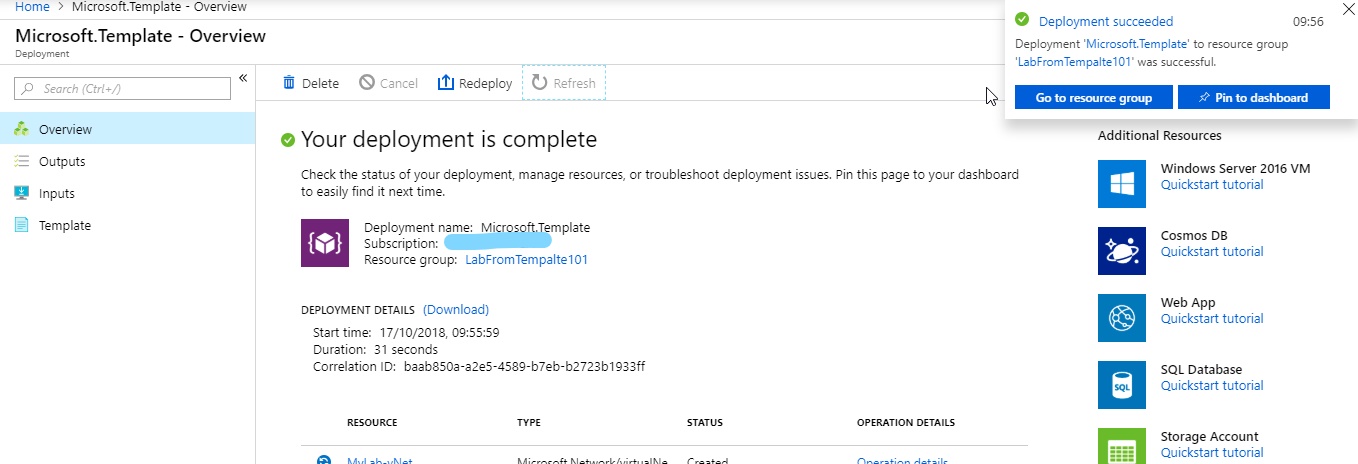
Once it’s complete, click on your vnet name to go and see your resource.
Amazing! Not really but it’s the first Lego brick in your 3000 piece Death Star.
Now for Powershell
- Open a powershell session
- Change directory to where you downloaded the template in the last section
- Connect to your azure account by typing Connect-AzureRMAccount and login as prompted
- Check in the right place by going a Get-AzureRMResourceGroup -ResourceGroupName BOB replacing BOB with the resource group you used in the previous section
- Now we’re going to deploy our vNet template again so type the following (replacing the RGname with yours and the location of the template file you downloaded to match where you saved yours.
New-AzureRmResourceGroupDeployment -Name LabVnet -ResourceGroupName LabFromTempalte101 -TemplateFile .\Downloads\template.jsonIt completes and you now have 2 vNets…….oh wait, NO you just have the one, the same one you set up before.
ARM IS DECLARATIVE. You just told it to “make sure I have a vnet called this with these properties”. It went and checked, and you have. So it just ended, changing nothing, it didn’t recreate our first vnet, it just left it alone.

Go edit the template.json file and edit the resources section and change the name, e.g. something like this
"parameters": {},
    "resources": [
        {
            "name": "MyLab-vNet10000",
            "type": "Microsoft.Network/virtualNetworks",
Save it and re-run the above powershell command.
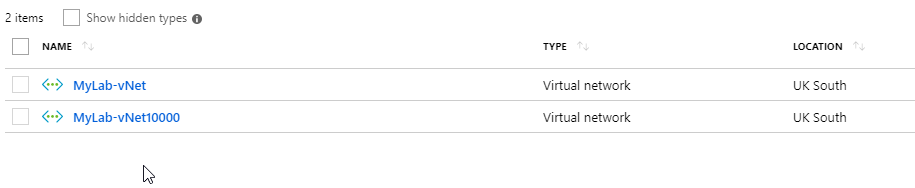
Once that completes, you can now see you have 2 vNets in the same Resource group.
Fiddly, but in the next lesson we’ll deal with parameters.
Summary
- You logged in
- Took the framework empty ARM template, added a resource through the portal, which created some variables.
- You deployed it from the portal and got a new vnet
- You deployed the identical template from powershell and go no new vnet, as a vnet with that name and settings already existed.
- You edited the template (changed the vnet resource name) deployed it again and voila. 2 vNets now.
- REMEMBER ARM IS DECLARATIVE!!!!
- REMEMBER ARM IS DECLARATIVE!!!!
- REMEMBER ARM IS DECLARATIVE!!!!